How to Clean Broken Glass on Kitchen Tile:
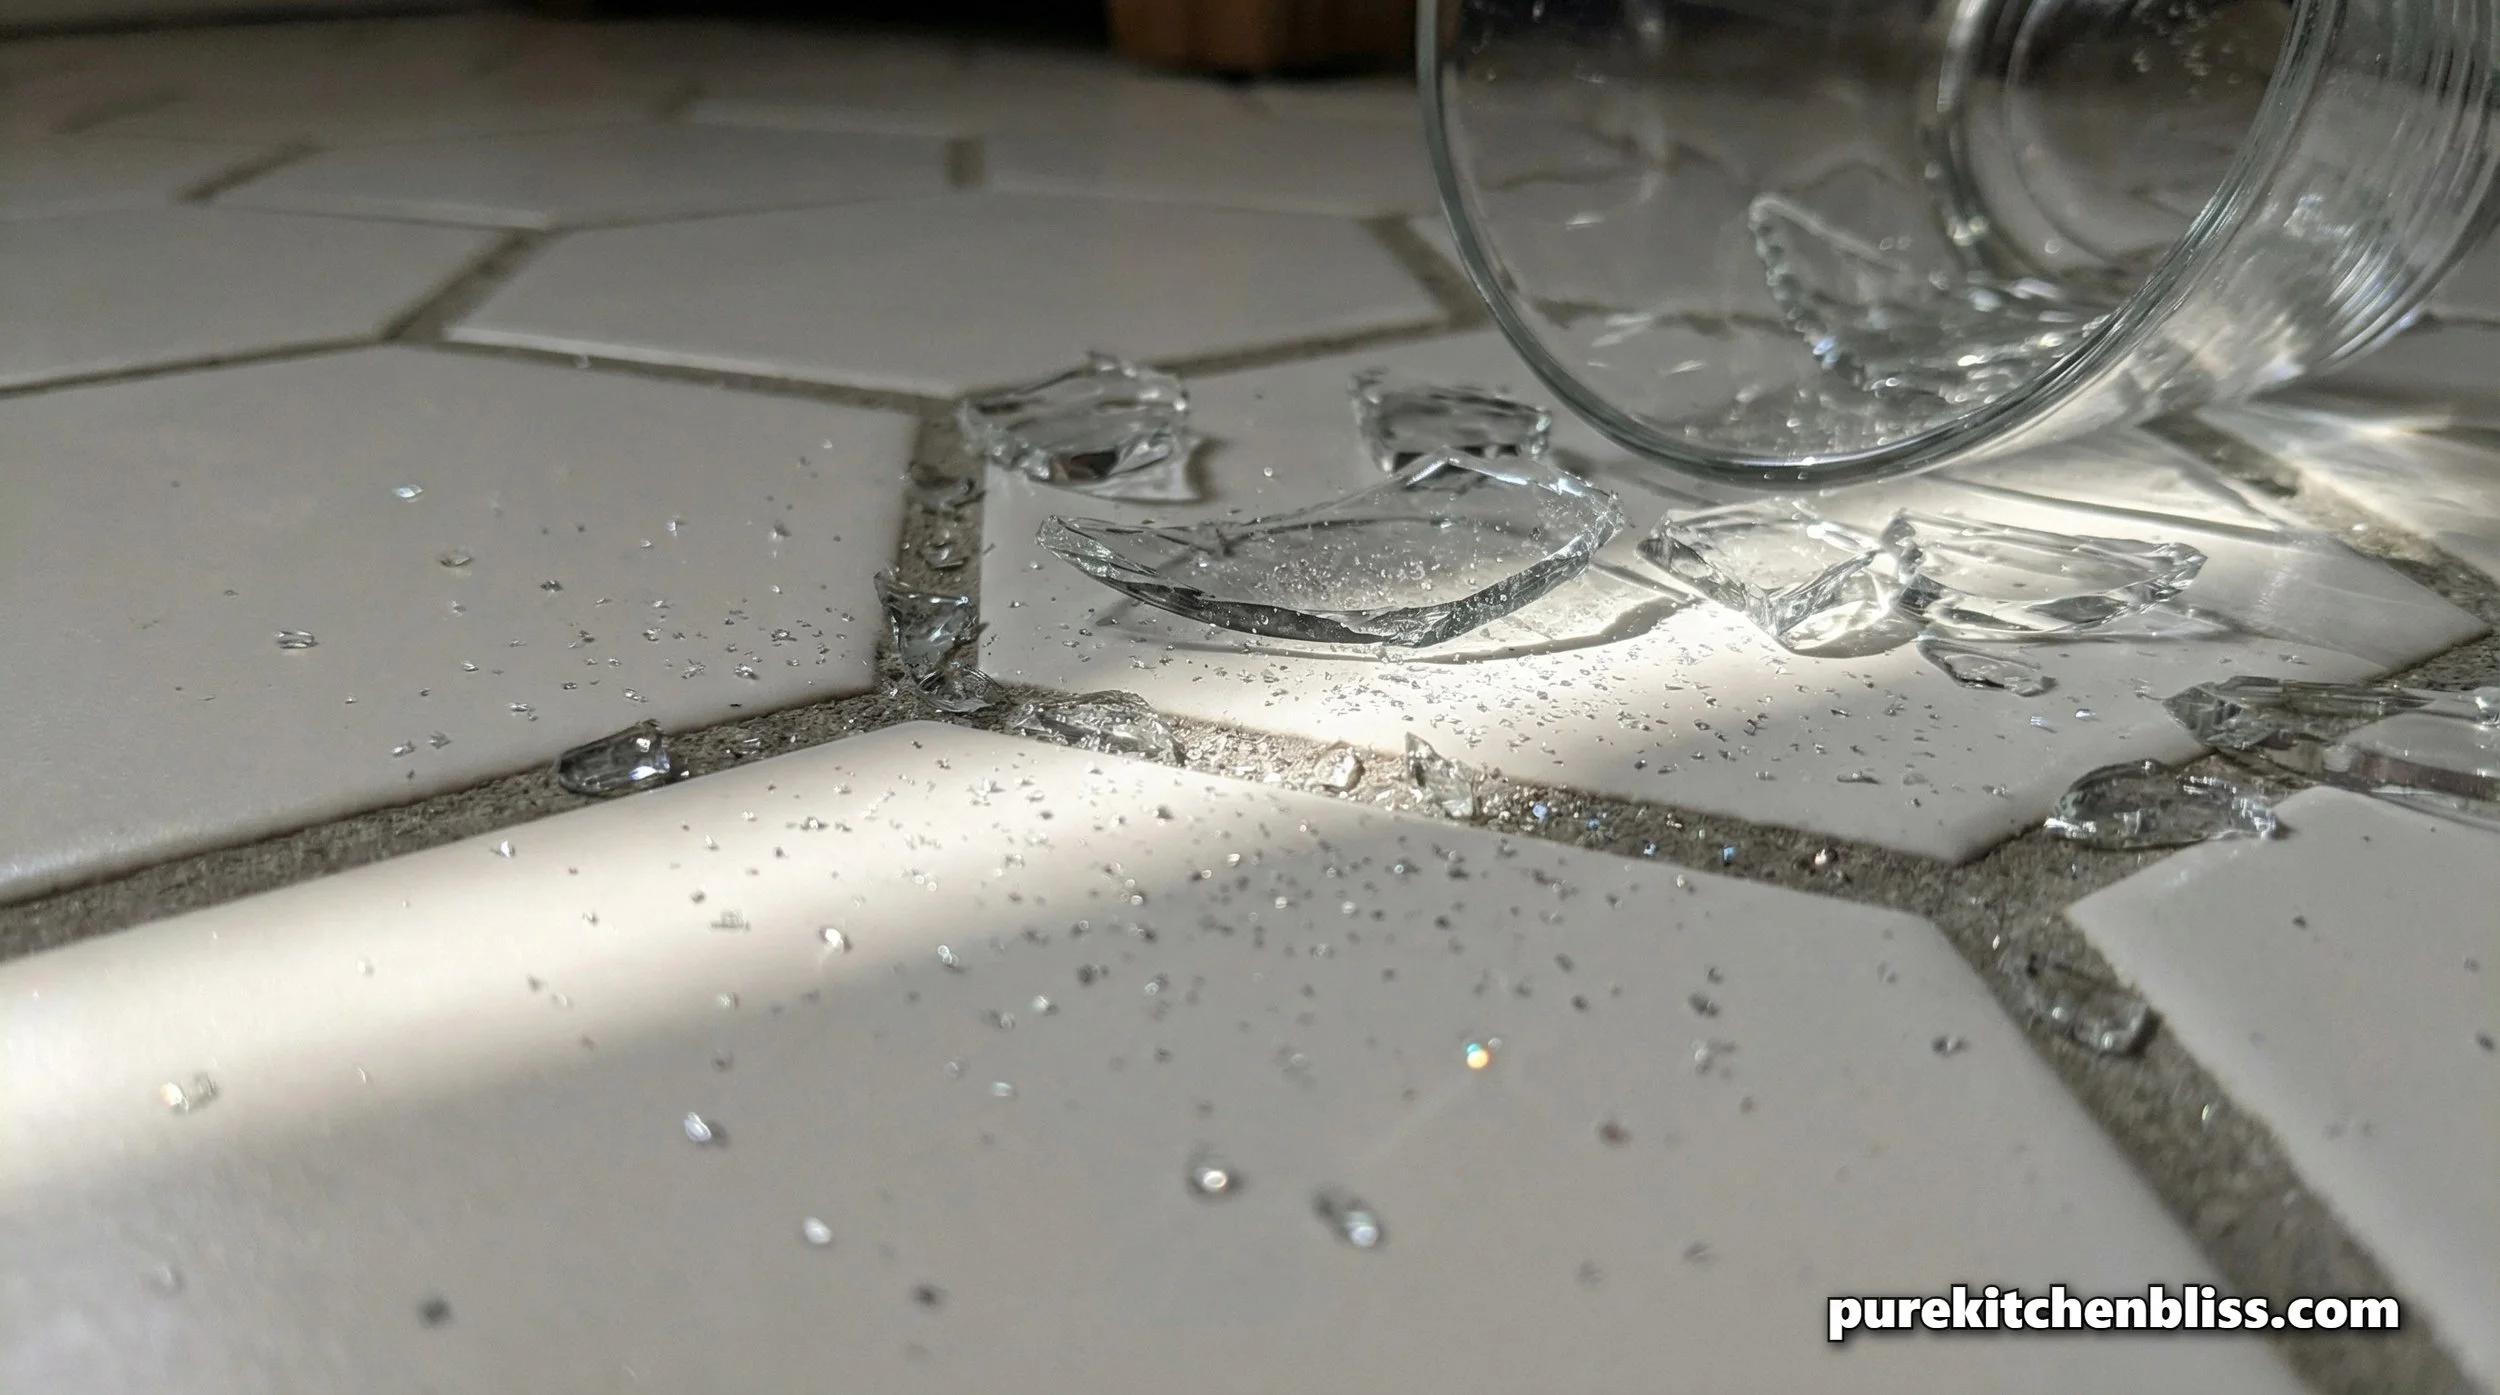
When a glass hits a hard fired ceramic or porcelain tile floor, the physics of the impact creates a "debris field" far larger than most homeowners realize. The impact generates three distinct types of hazards: Shards (the visible, structural pieces), Slivers (needle like fragments), and Glass Dust (microscopic particles).
If you only perform a standard sweep, you are merely moving the shards while leaving the slivers and dust behind in the "valleys" of your grout lines. In a high-performance home, we don't just "clean up"; we perform a Search and Extract ritual. Here is the professional, non-toxic protocol to ensure your sanctuary remains safe for bare feet.
1. The Ballistics of Glass: Why the "Sweep" Fails
As a builder, I look at the "kinetic energy" of a break. When a glass falls from counter height (36 inches), it doesn't just break; it explodes. Micro-shards can travel up to 15 feet from the point of impact, often ricocheting off baseboards and landing under the Breakfast Bar or inside the "toe-kick" recesses of your cabinets.
The "valleys" of your grout are the primary collection points for glass dust. Because grout is a porous, sand-based material, it acts like a trap for these microscopic fragments. A standard broom is too large to reach into these crevices, and its bristles can actually "flick" small slivers further across the room.
2. Stage 1: The Mechanical Extraction (Large Shards)
Never use your bare hands, even for the "big pieces." Use a piece of stiff cardboard or a dedicated Small Kitchen Organization dustpan to gather the visible debris.
The Builder’s Rule: Do not use your regular "daily use" broom for the first pass. Glass shards can get caught in the bristles and "re-seed" your kitchen with glass every time you sweep for the next month.
The Disposal Protocol: Place all glass into a thick paper bag or a discarded cardboard box before putting it in the Kitchen Garbage. This prevents the glass from slicing through the plastic liner and creating a secondary hazard for whoever takes the trash out.
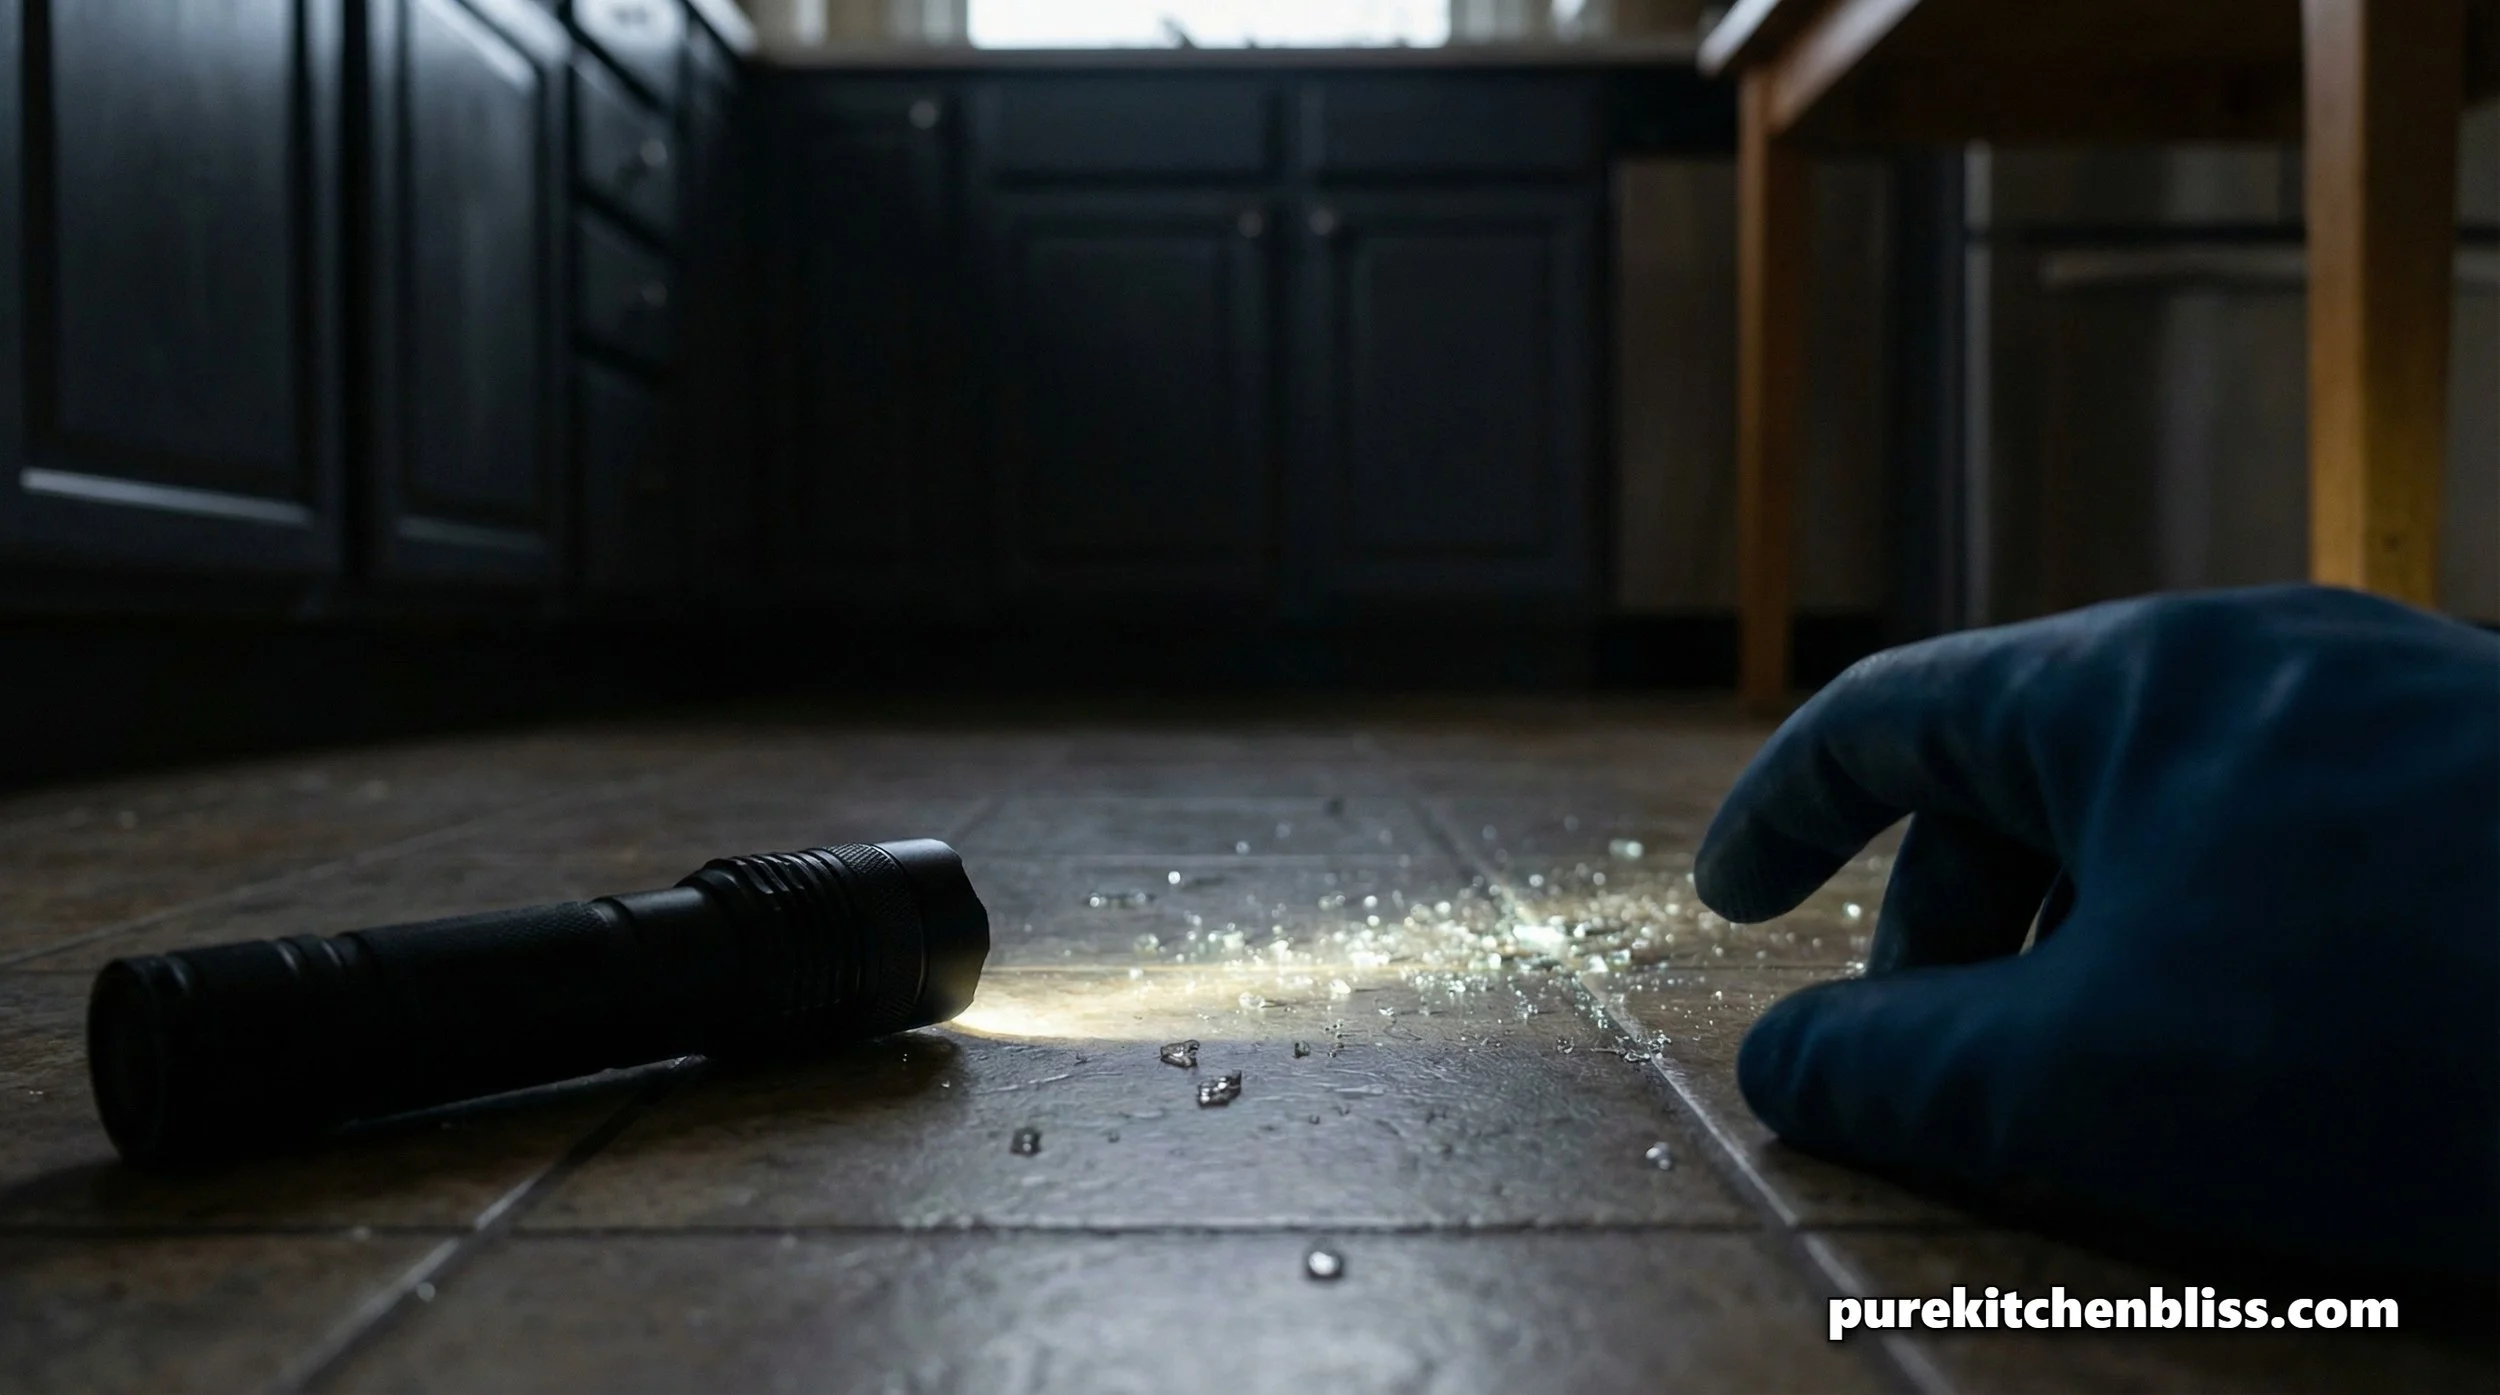
3. Stage 2: The "Flashlight" Search
This is a professional trick used in the trades to find imperfections in a drywall finish or a tile installation. It is the only way to find "invisible" glass.
The Protocol: Turn off all overhead lights and close the blinds. Lay a high-powered LED flashlight flat on the floor.
The Science: The light hits the floor at a low "raking" angle. Because glass is reflective, the shards will glint, and even the smallest sliver will cast a long, exaggerated shadow. Sweep the beam in a 360 degree arc around the impact zone. You will likely find glass under the fridge and in the corners of the room that you missed during the initial cleanup.
BUILDER TIP: THE VACUUM WARNING
Never use a vacuum with a "beater bar" (the rotating brush) on broken glass. The spinning bristles will act like a catapult, launching micro-shards at high velocity across the room. Only use a Shop-Vac or a vacuum hose attachment for direct, high-pressure suction. Even then, check the filter afterward; glass dust can shred HEPA filters if not handled carefully.
4. Stage 3: The "Soft Extraction" (The Micro-Shards)
Once the vacuum has done its work, the microscopic dust remains. To extract these from the grout, we use "sticky" infrastructure.
The "Bread Hack"
Take a slice of soft, fresh white bread and press it firmly against the tile and grout lines. The porous, moist texture of the bread acts like a biological magnet, pulling the shards out of the crevices and into the dough. Discard the bread immediately in your sealed glass box.
The Damp Paper Reset
For the final pass, wring out a wadded up paper towel until it is just damp. Pat the floor, do not wipe. Wiping can drag a shard across your tile, potentially scratching the finish. Patting lifts the remaining dust through surface tension.
5. The "Vodka" Finish: Neutralizing Liquid
If the broken glass contained wine, juice, or oil, you now have a "chemical" mess on top of a physical one. Give the area a quick spray of your DIY Fabric Refresh or a mixture of water and 70% isopropyl alcohol.
The Benefit: The alcohol ensures any sticky residue is neutralized, preventing the "bio-film" buildup we discussed in How Often to Mop Kitchen Floors. Do a final wipe with a Tea Towel that you intend to wash immediately in a separate "high-water" cycle.
6. The Circulation Reset: The 15-Foot Rule
In a house with four kids, you have to assume the glass "hitchhiked" on clothing or pets.
Check the "Soft Infrastructure": Use a lint roller on any rugs, Breakfast Bar stools, or chair cushions within 15 feet of the break.
The Footwear Protocol: In our sanctuary, if glass breaks, the "barefoot" rule is suspended for 48 hours. Everyone wears shoes. This allows for two additional Weekly Deep Mops to catch any stragglers before we trust the floor again.
Conclusion: Total Physical Purity
Cleaning up glass isn't just about the "big pieces"; it’s about the microscopic details. By using the Flashlight Search and the Bread Extraction, you are protecting the "bones" of your kitchen and the safety of your family. This methodical approach is what separates a "quick clean" from true Home Stewardship.
Explore More in Your Kitchen Sanctuary:
To clean the floor after the glass is gone: How Often to Mop Kitchen Floors
To clean the towels used in the process: How to Strip Your Towels
To manage the "Beautiful Chaos" of a busy kitchen: The Sunday Night Countertop Reset