The Best Slim Dish Racks for Small Kitchens
Transparency Note: We independently select these products based on research and user reviews. If you buy something through our links, we may earn a commission.
In a high-output kitchen, counter space is the most valuable real estate. A drying rack should not just hold wet items; it is a piece of infrastructure that must manage moisture, prevent microbial growth, and facilitate rapid evaporation. If your rack fails to do this, it’s not a tool, it’s a permanent wet spot that invites oxidation and bacterial colonization.
The following list prioritizes "Structural Integrity" and "Hydro-Dynamics." We evaluated these models based on three specific metrics: Material Fatigue (how they handle wet environments), Flow-Dynamics (how effectively they move water away from the dishes), and Spatial Density (how much volume they handle per square inch of countertop).
The Top 3 Performance Drying Racks
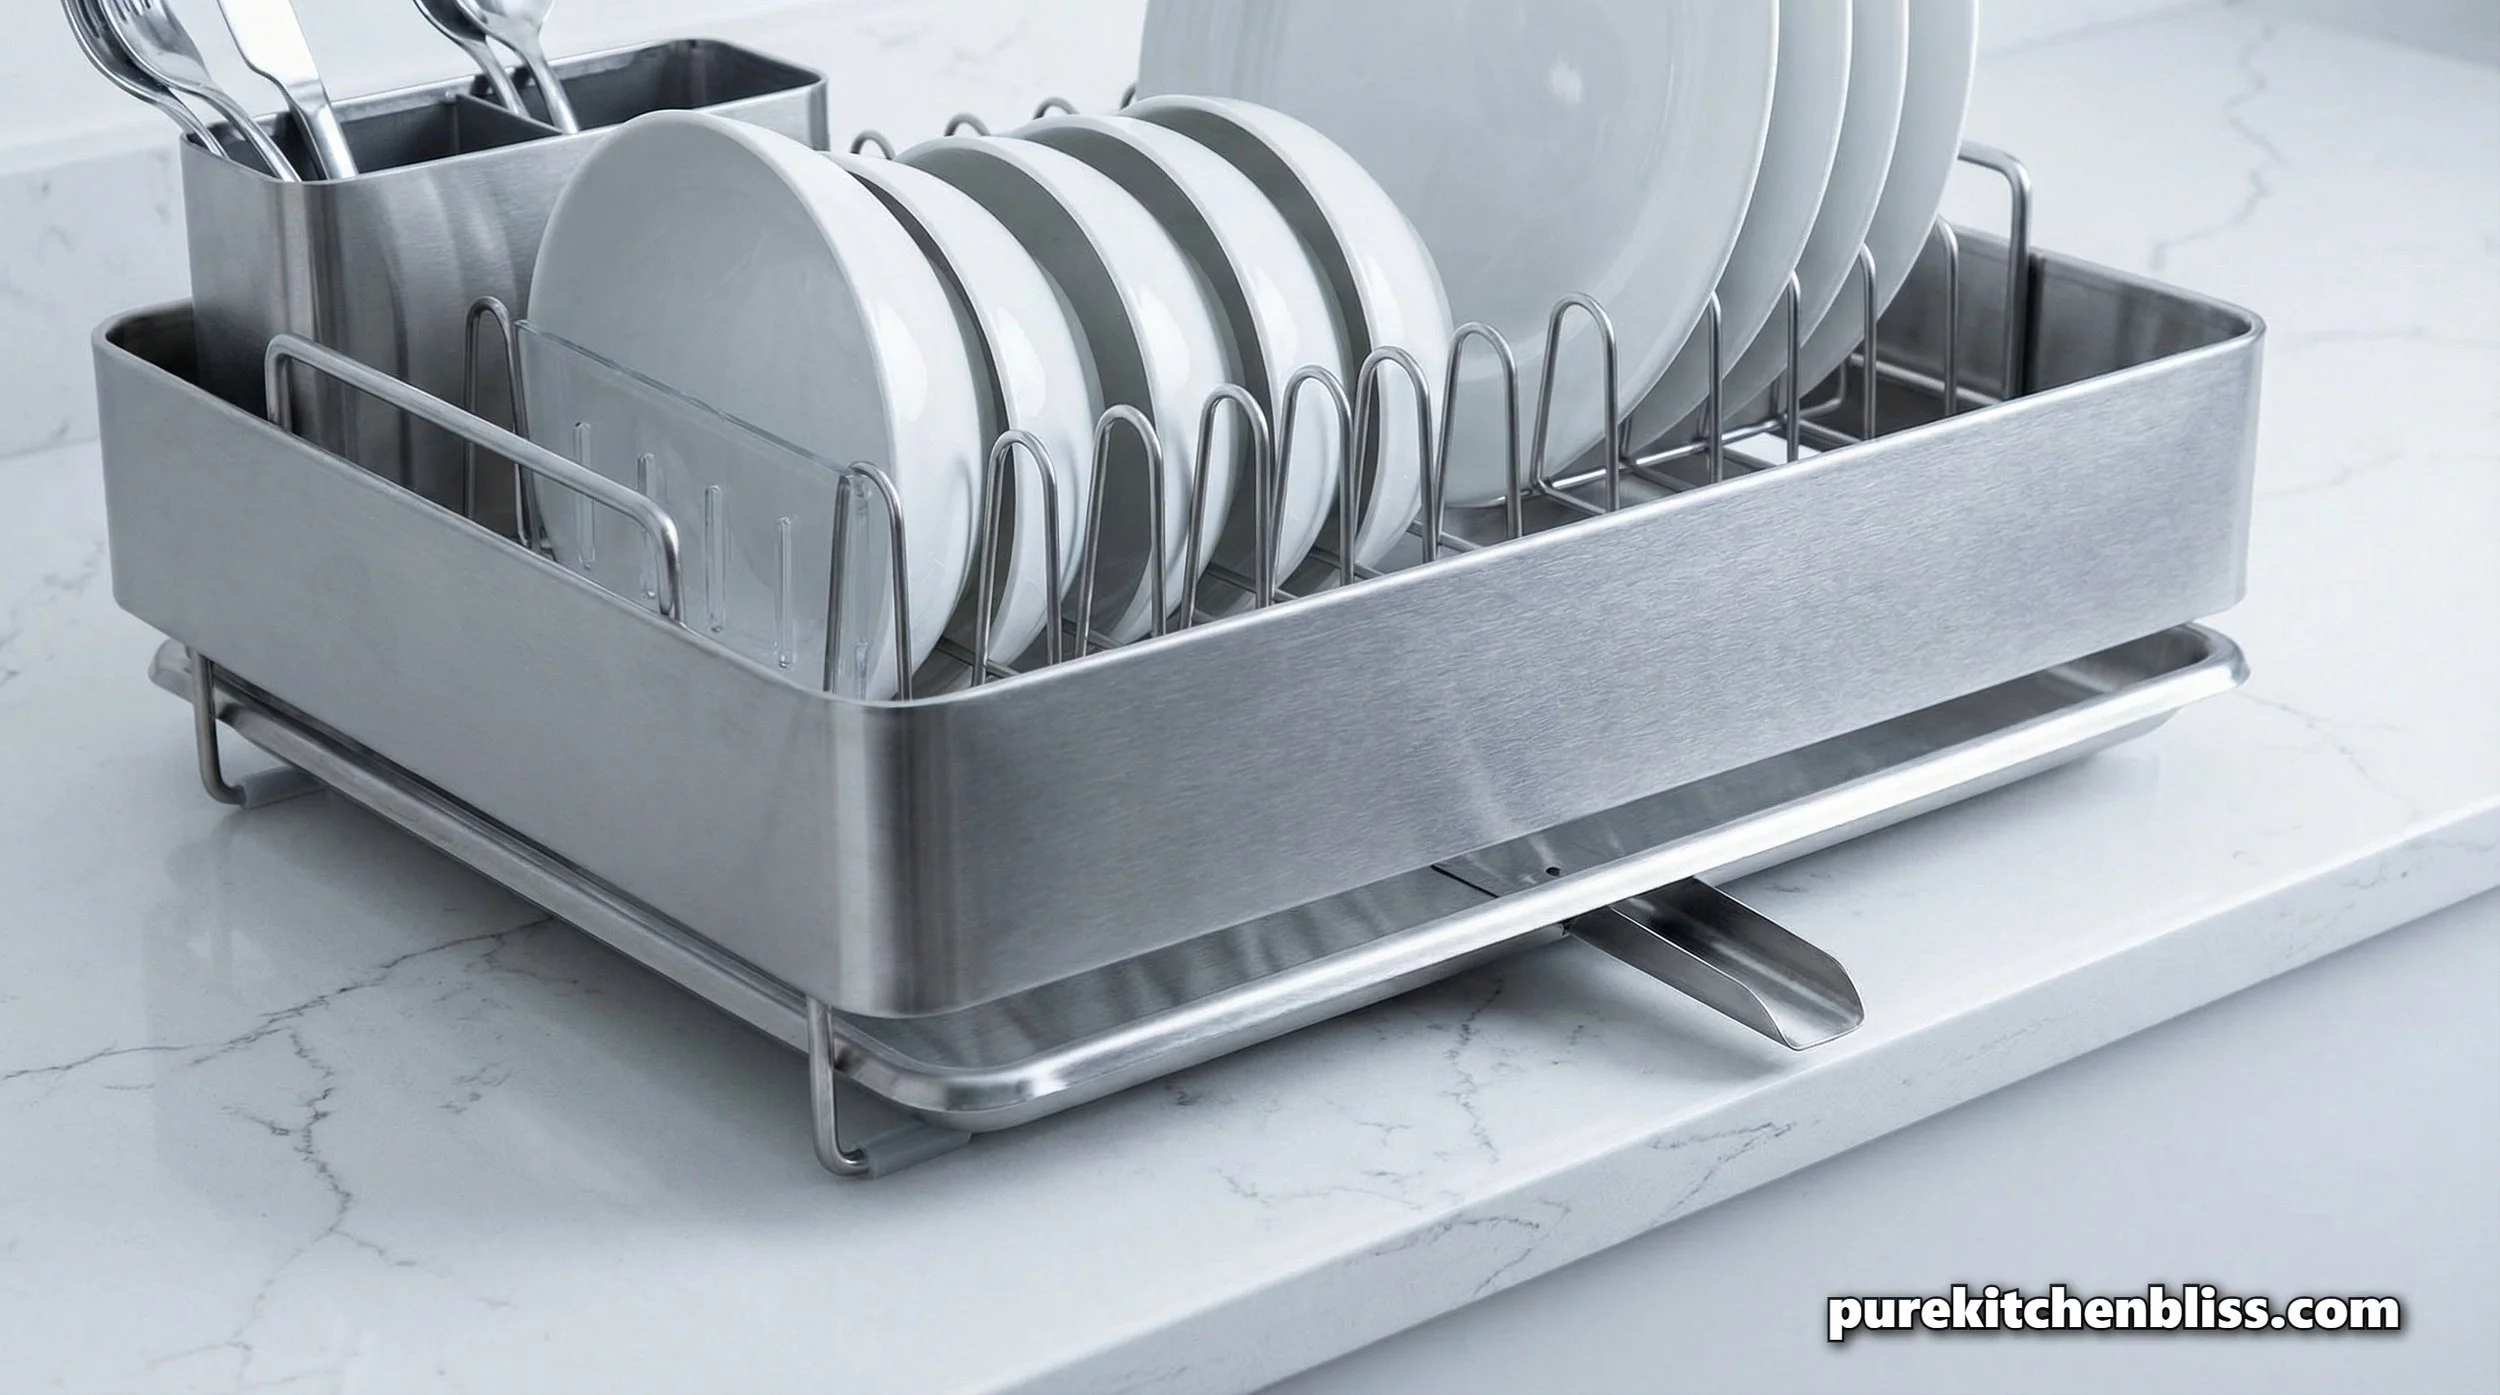
1. The "Workhorse" Pick: Premium Stainless Modular Rack
If your priority is zero oxidation and lifetime service, this is the industry standard. It uses 304 grade stainless steel, which is essentially the marine-grade specification for indoor kitchens.
The Spec: Features an integrated, sloped tray that eliminates the "pooling" effect. The wire spacing is calibrated to maximize the evaporation surface area.
The Verdict: This is not a "disposable" rack. Because the joints are laser-welded, there are no crevices for mold or biofilm to accumulate. It is the most expensive option, but it effectively eliminates the need for replacement cycles.
Best For: Households with daily, heavy-volume usage.
2. The "Density" Pick: Two-Tier Vertical Stacker
When floor space is at a premium, verticality is the only engineering solution. This model solves the footprint problem by doubling the drying capacity without expanding into the "main flow" of your workspace.
The Spec: Engineered with a tiered frame that separates glass and plate storage. The upper level features a specialized rack for fragile stemware, keeping it elevated and away from the impact zone of dinner plates.
The Verdict: The vertical design forces airflow through the center of the rack. In a compact kitchen, this provides the best drying time per square inch. It requires periodic cleaning of the central supports to prevent dust buildup.
Best For: Narrow apartment kitchens or high-density family setups.
3. The "Minimalist" Pick: Adjustable Low-Profile Tray
For kitchens that require a rack to be stowed away when not in use, this is the solution. It relies on a high-friction, non-slip base that stays stable even when fully loaded with heavy cast iron.
The Spec: This unit utilizes an adjustable frame, allowing you to widen or narrow the footprint based on your immediate needs. It’s constructed from recycled, food-grade polypropylene and silicone, meaning it is immune to the rust that plagues metal alternatives.
The Verdict: While it lacks the thermal mass and durability of stainless steel, it is the best solution for maintaining a clear Sunday Night Countertop Reset. It dries easily and stores in a shallow drawer.
Best For: Minimalists who prioritize a clear, empty counter.
Technical Audit: What Makes a Drying Rack "Professional Grade?"
When you evaluate a drying rack, ignore the marketing copy and look at the physical mechanics. Here is how to audit the infrastructure of your drying zone:
1. The Material Standard
Stay away from "coated wire" racks. If the metal is not 304 stainless steel, it is likely mild steel or aluminum with a thin powder coat. That coating is the point of failure. Once a knife or fork nicks the surface, the underlying metal will begin to oxidize. You will see rust within 90 days. Only stainless steel is a homogeneous, non-porous material that will not degrade in a wet environment.
2. Slope and Hydro-Dynamics
A flat-bottom tray is a design failure. Physics dictates that water will seek the path of least resistance. If the tray is perfectly horizontal, the water stays put. Look for a tray with a minimum 2° to 5° pitch. This "gravity assist" is the difference between a dry rack and a slime covered tray that requires weekly scrubbing. If your current rack is flat, you are effectively forcing yourself to perform extra maintenance.
3. Evaporation Efficiency
Drying is a function of surface area and airflow. The "best" racks lift the dishware off the rack frame using small, rubberized contact points. This maximizes the amount of air exposure. If your dishes rest on a solid surface, you trap the moisture underneath, creating a breeding ground for bacteria.
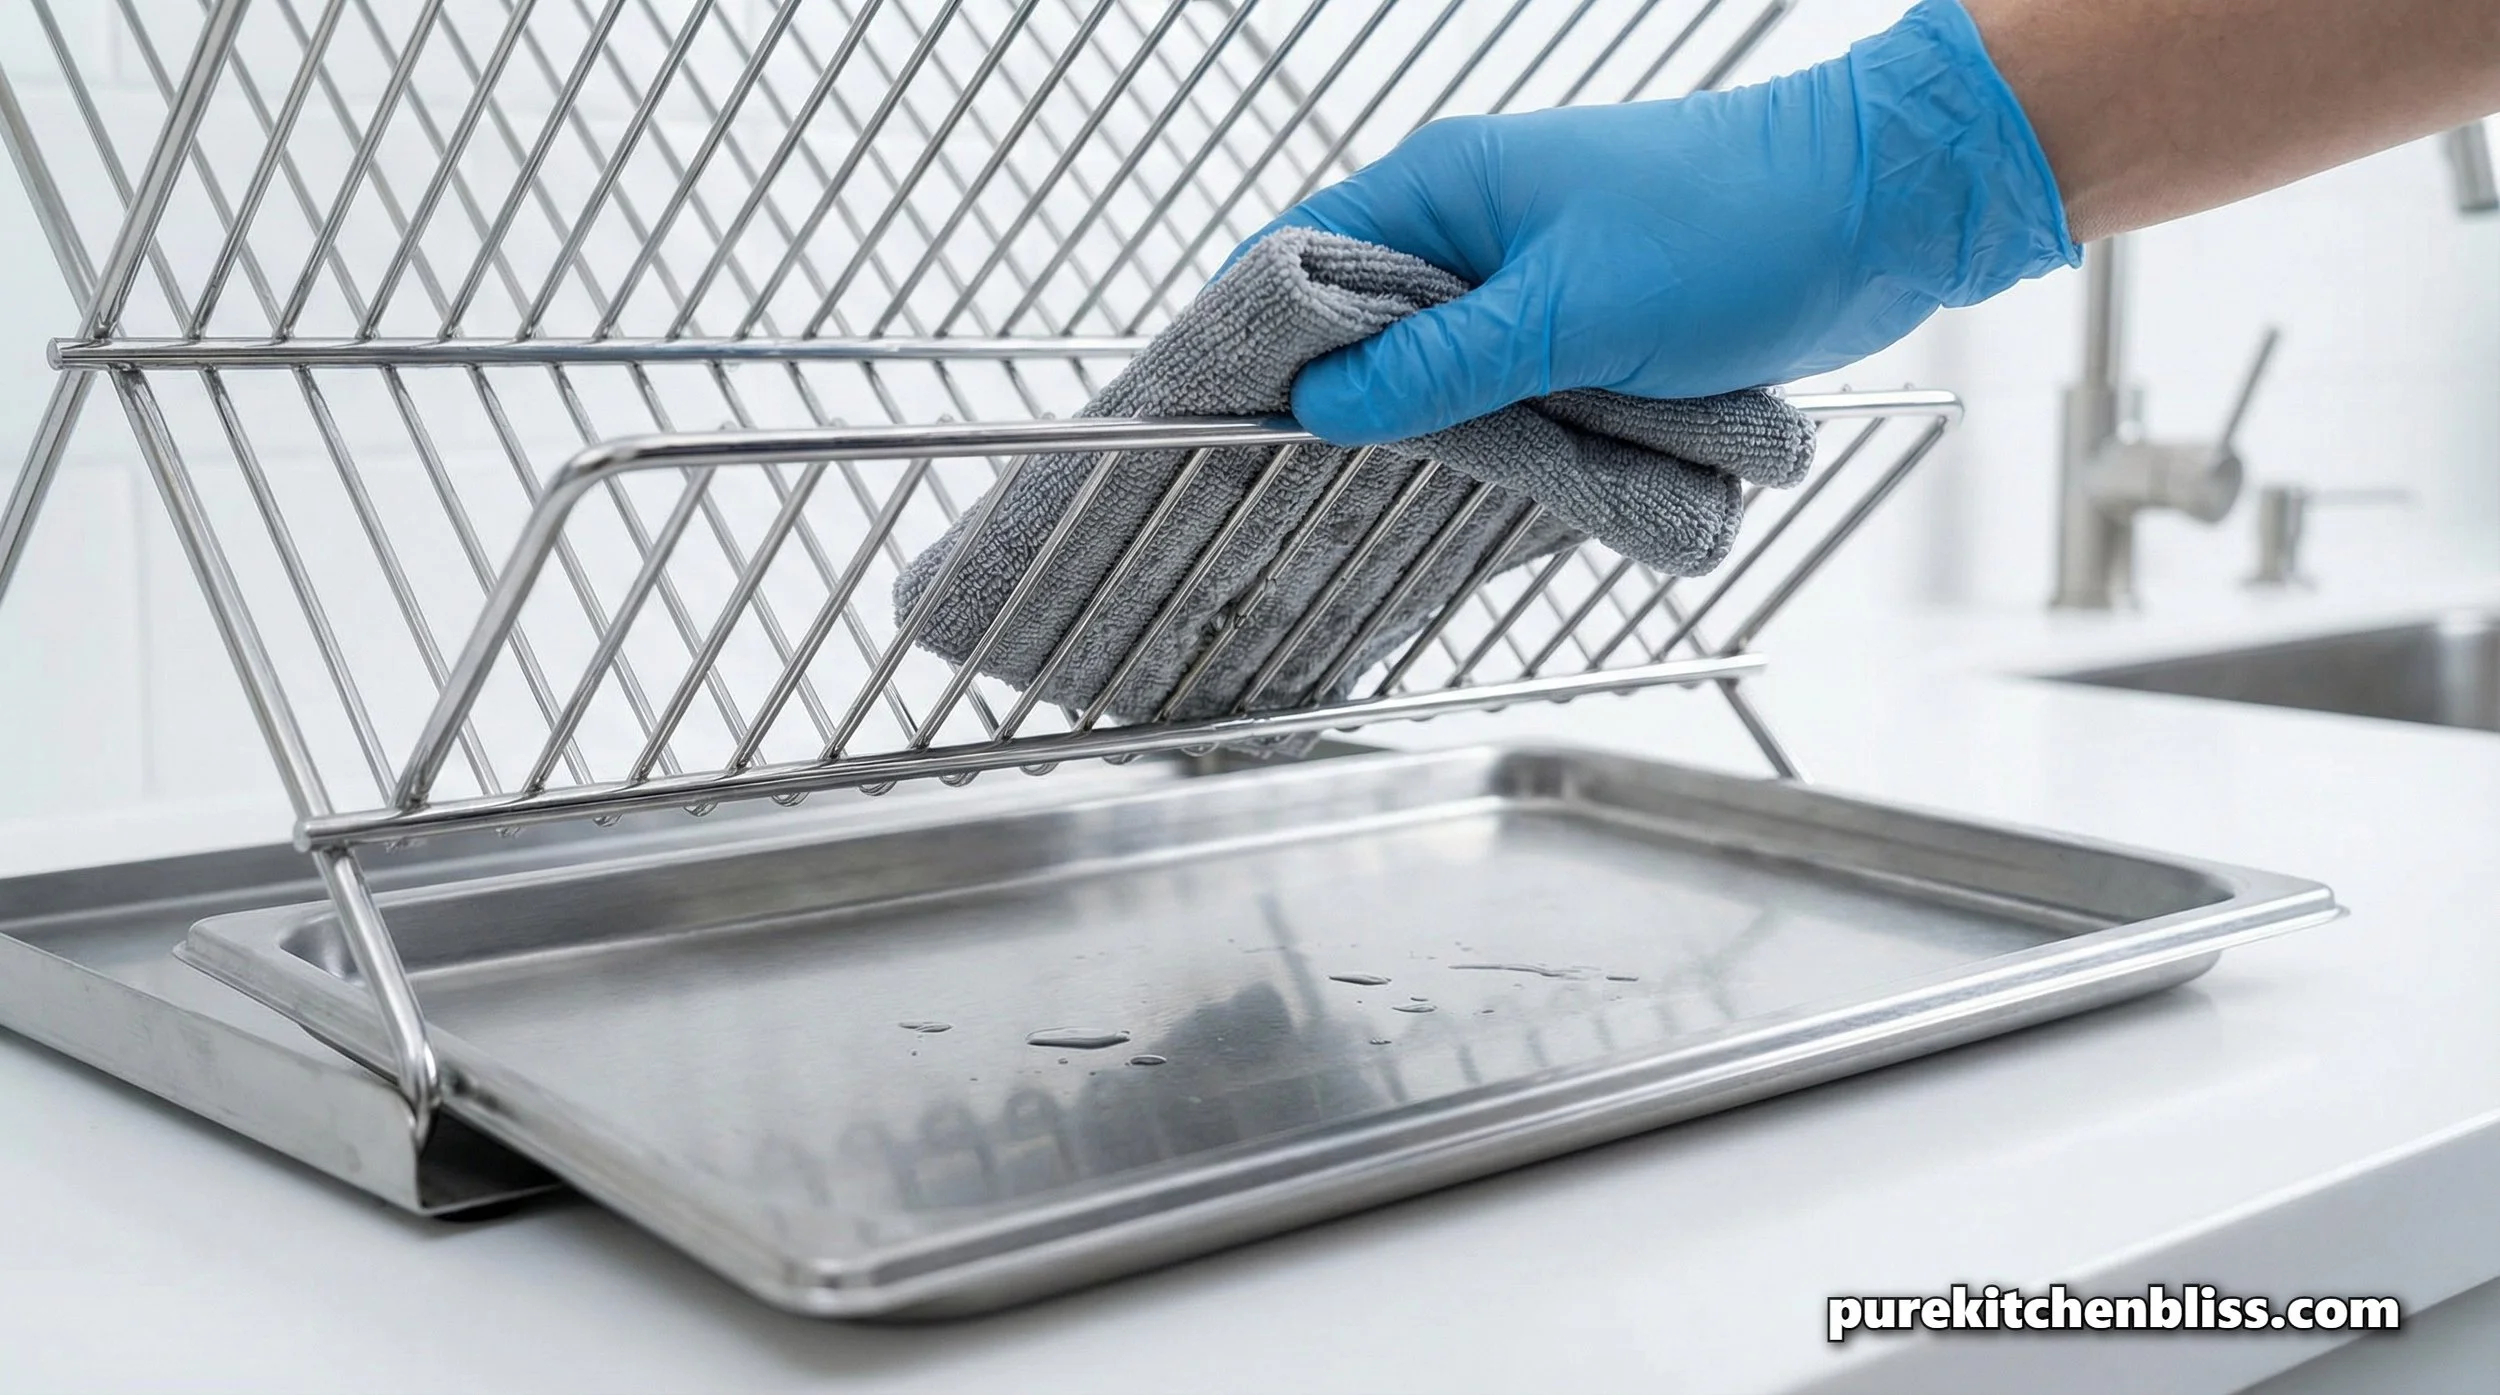
Maintenance Protocol: The Weekly Extraction
Regardless of the model you purchase, the rack is not a "set-and-forget" piece of hardware. It requires a weekly maintenance cycle to prevent the "biofilm" accumulation we discussed in the Smelly Sink Guide.
The Extraction: Remove the drainage tray and rack assembly.
The Scrub: Use a drop of Castile Soap and hot water. Avoid using harsh scourers on stainless steel, as they can cause micro-scratches where bacteria can hide.
The Sanitize: If you notice hard water spots, use a 50/50 mix of White Vinegar and water to dissolve the minerals. Rinse thoroughly.
The Re-Installation: Ensure the rack is completely dry before resetting it. Placing a rack back on a wet counter traps moisture against your Countertop Workspace, which is how long term water damage begins.
Final Recommendation: The Performance Standard
If you are tired of rust, slime, and racks that simply do not perform, stop looking for "affordable alternatives." You are likely paying for these items twice or three times over the course of a year. Invest in the stainless steel model (304 grade). It is the only material that satisfies the technical requirements of a high-performance kitchen.
Explore More in Your Sanctuary:
To optimize your sink area: Why Does My Kitchen Sink Smell?
To clean your countertop effectively: 5 Brilliant Uses for Castile Soap